
This is part 1 in a series of tutorials in which we learn how to create forms with Oracle Visual Builder (OVB) for a website built with Oracle Content and Experience (OCE) Sites.
This article will explain how you can build a local OCE Sites component that uses REST API exposed by a business object in Visual Builder to display a simple public form on a site page that allows collecting contact details of your site visitors.
Create Business Object in Visual Builder
1. Configure Visual Builder
Start by enabling REST API calls from your OCE Sites pages to REST endpoints exposed by business objects that you will create in Visual Builder.
Use left navigation panel to open Settings page. In the “Allow Origins” section, click on the “New Origin” button and enter URL of your Content and Experience service as the “Origin Address”:

2. Create Visual Application
Next, create a new Visual Application in OVB – “RequestForm” – that will contain business object to store site visitor’s contact details and configure it to allow anonymous access:
Select “RequestForm” on the list of applications and click on the Settings option in the pull-down menu:

On the Settings dialog, open “User Roles” tab check “Allow anonymous access” option to allow anonymous access to the application and its services:

On the list of applications click to open “RequestForm” in the Builder, select Business Objects on the left navigation panel and then use “+” to add new “requestform” object:

Open the Fields tab and then add Name, Email, Phone, Subject and Message fields of String type to the “requestform” object:

Once done, open the Security tab and grant Anonymous user Create permission to enable adding a new record form a form hosted on a public page:

We are done with Visual Builder setup and can now proceed to creating a simple form for collecting visitor contact details on OCE Sites page.
Build OCE Sites Component with a Form
Configure Visual Builder Connection
Before you can start developing custom components that use Visual Builder, you need to configure connection to Visual Builder service. In your Content and Experience service use Integrations link on the left navigation panel to open Applications page. Select Preferences for the Visual Builder Cloud Service integration and enter URL for your Visual Builder service:

Create Local Component
I assume that you are familiar with developing custom components for Oracle Content and Experience. If not, please start here. The component framework in OCE allows you to use React, Vue or other UI framework to develop custom components. In this tutorial I will use default Knockout View Model with Mustache JS presentation template. To use sample code snippets described below without any change you should confirm that in the Visual Builder you used the following naming convention:
- The visual application name is “RequestForm“
- The business object name is “requestform” and it has fields:
- name (required)
- email (required)
- phone
- subject
- message
In OCE open Developer > Components page (note, you need to have CEC Developer role to see Developer entry on the left navigation panel) and create new Local Component. I called it “VBCS-Request-Form“, but you can pick a different name.
Start by modifying the render.js file to add code to obtain Visual Builder connection URL that you have configured. There are two ways to get this connection:
- From the siteinfo.json file at runtime, and
- From the Integrations in the Site Builder

Next, create the observables in the Knockout view model for the fields in the contact details form:

Handle required fields in the form by enabling Submit button only after all required fields have value:

After visitor clicks on Submit button, POST request to the REST API endpoint of the business object that you created in the Visual Builder:

To create the form that your custom component will display on a site page, edit the comptemplate.html file to add simple HTML markup with Mustache template, something like the HTML snippet below:

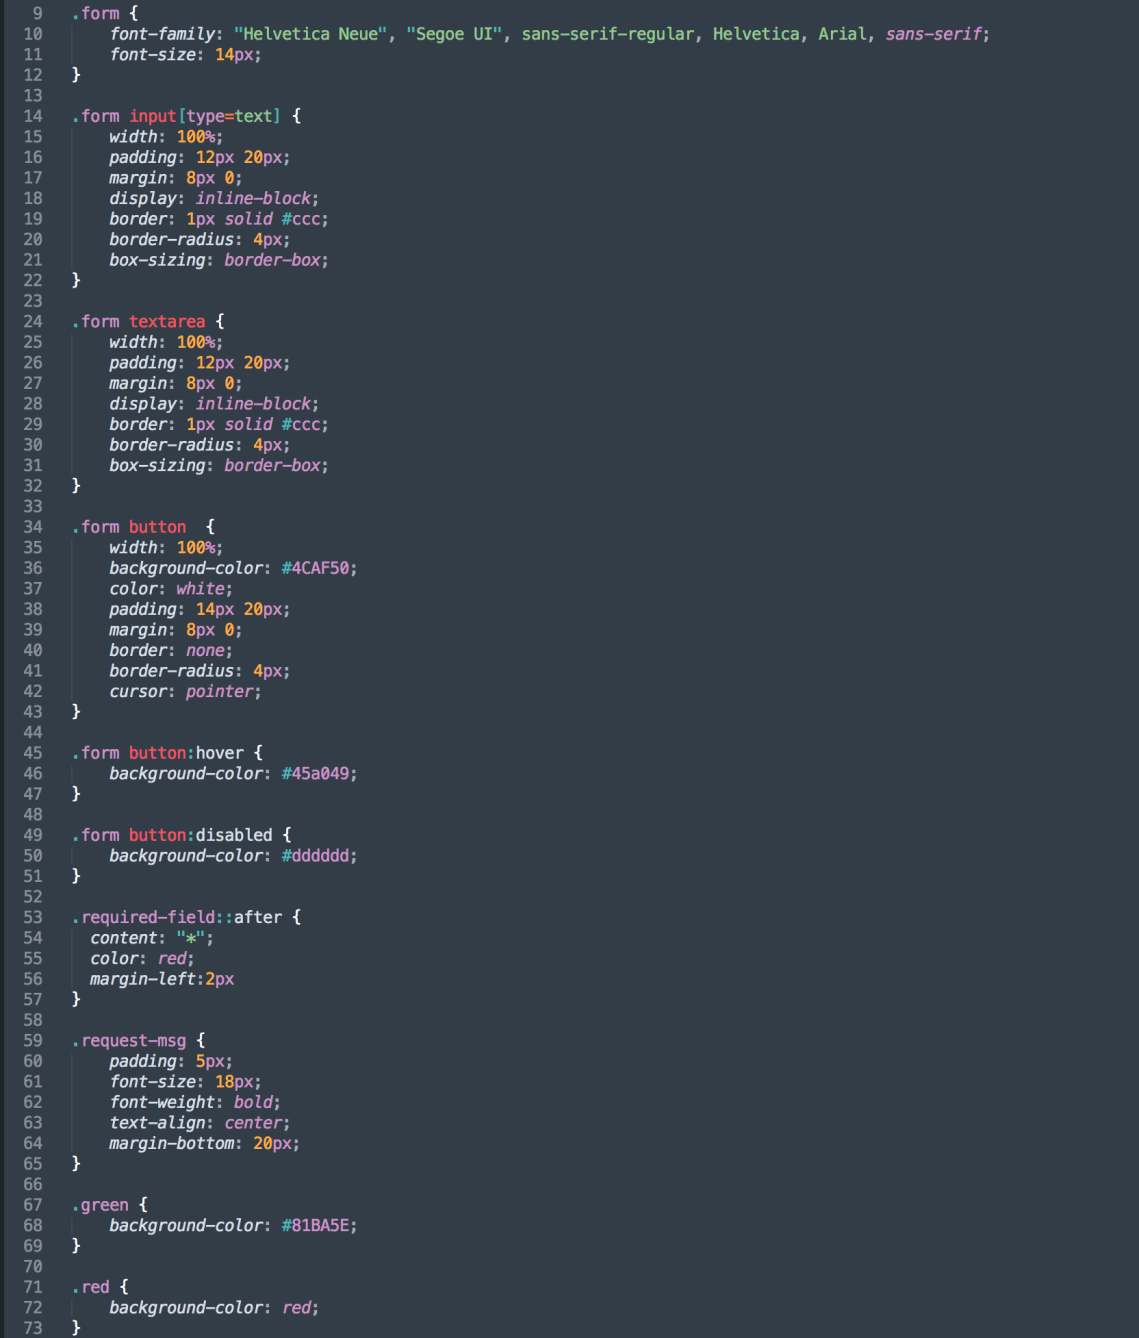
To style the form I added the following CSS classes into the design.css file that you can fined in the component’s assets folder:
I hope you managed to build custom component following the steps in the above tutorial. If not, you can download the VBCS-Request-Form export file, upload it to a folder on your Content and Experience service and then use Create > Import Component option to add it to Components catalog:

To test your new component you can add it to an existing site or create a new site on OCE Sites.
Summary
In this tutorial you learned how to build custom local component in Oracle Content and Experience that leverages REST API exposed from a business object in Visual Builder to deliver a simple form to collect site visitor’s contact details on a public site. In the next article you will learn how to modify web application in Visual Builder as well as OCE Sites component to create a form that requires user authentication.

1 Comment